3 Getting started
3.1 Installing packages
If you have installed the below packages already, you can jump to the next step.
install.packages("data.table")
install.packages("dplyr")
install.packages("RPostgreSQL")
install.packages("profvis")
3.2 Loading packages
Load the packages for today’s talk
library(data.table)## data.table 1.13.2 using 8 threads (see ?getDTthreads). Latest news: r-datatable.comlibrary(RPostgreSQL)## Loading required package: DBIlibrary(dplyr)##
## Attaching package: 'dplyr'## The following objects are masked from 'package:data.table':
##
## between, first, last## The following objects are masked from 'package:stats':
##
## filter, lag## The following objects are masked from 'package:base':
##
## intersect, setdiff, setequal, unionlibrary(profvis)3.3 Install PostGIS and Alteryx software
3.3.1 Install PostGIS
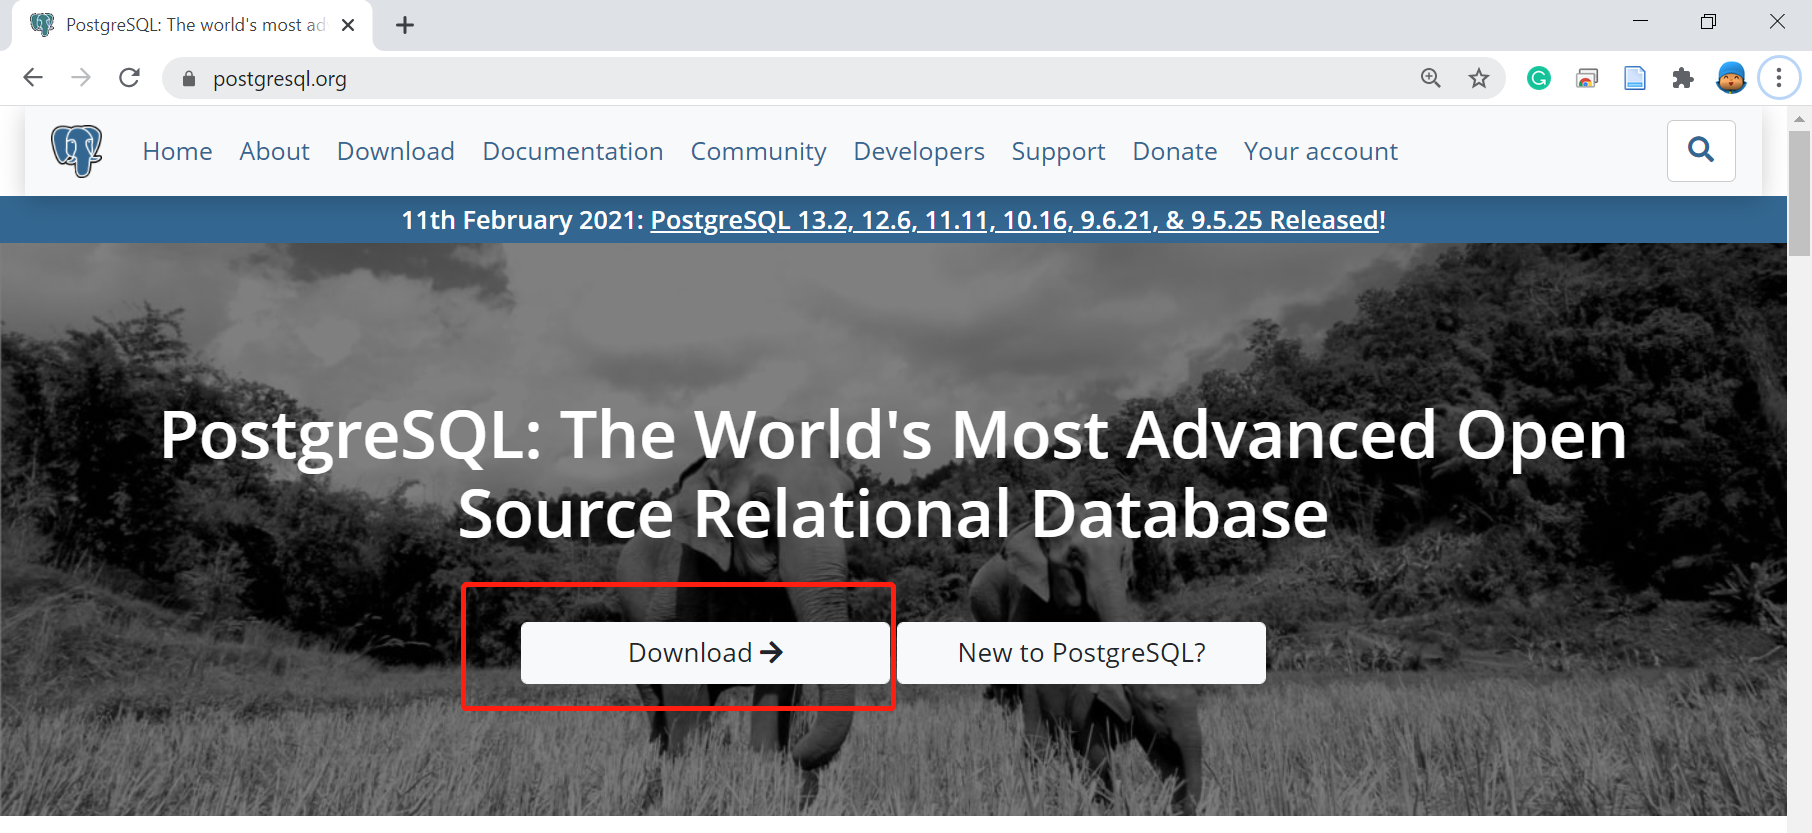
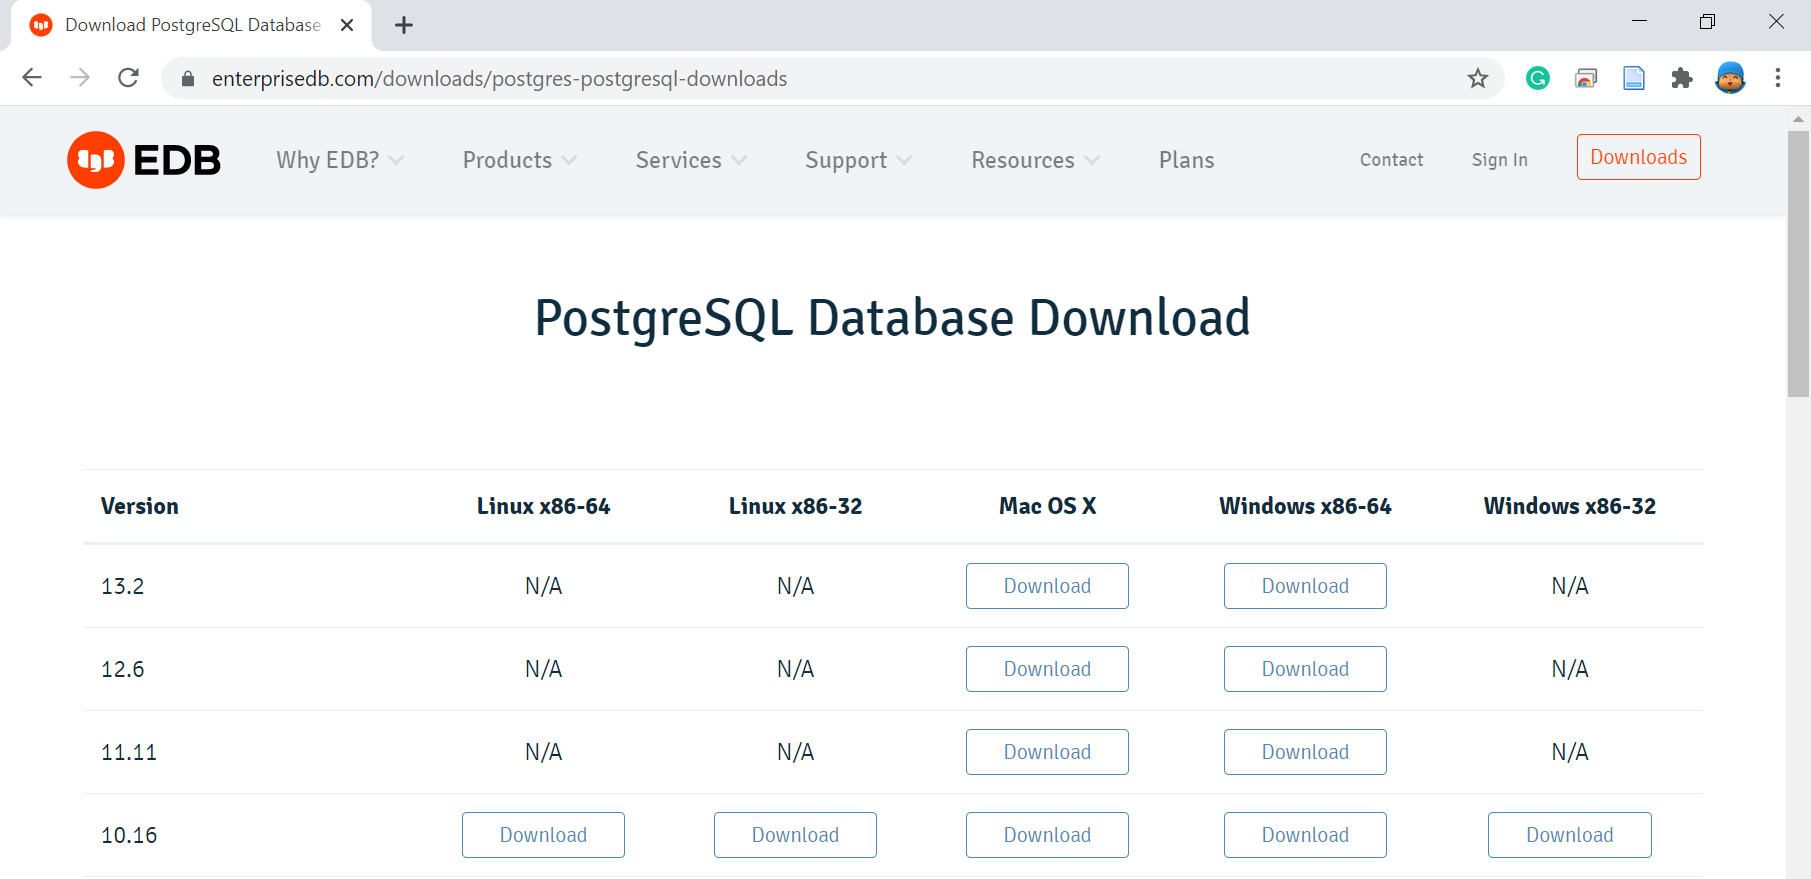
- Step 1: download the PostgreSQL
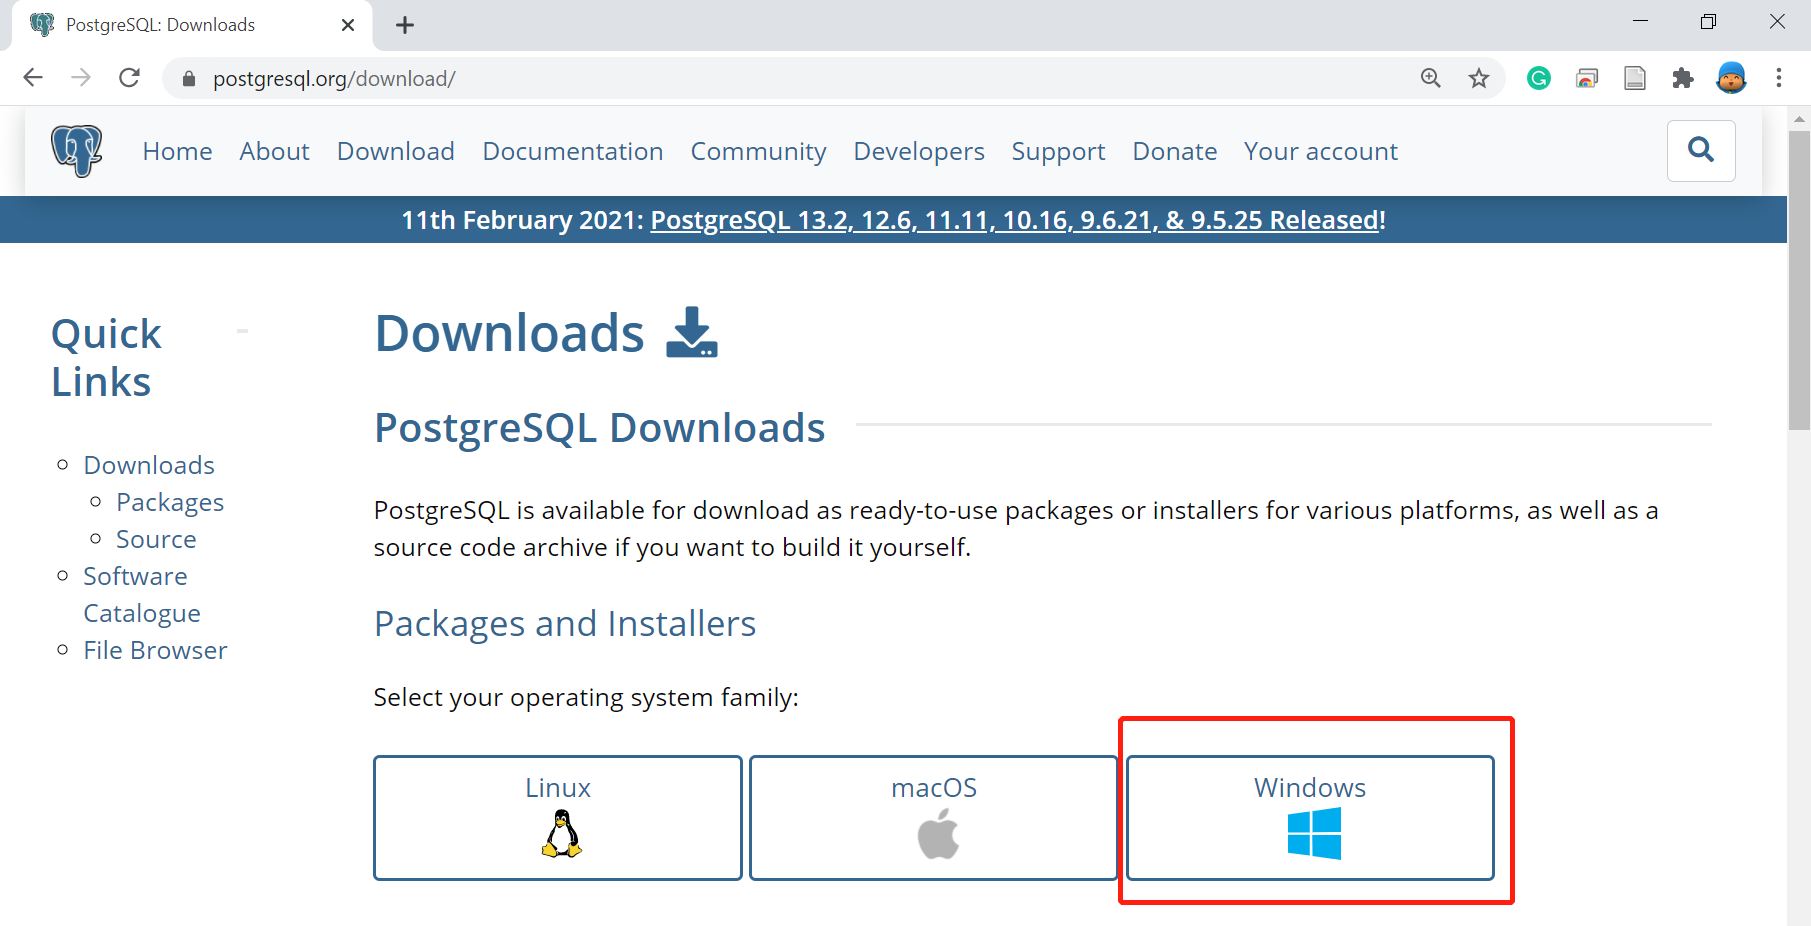
- Step 2: select the right version for your system
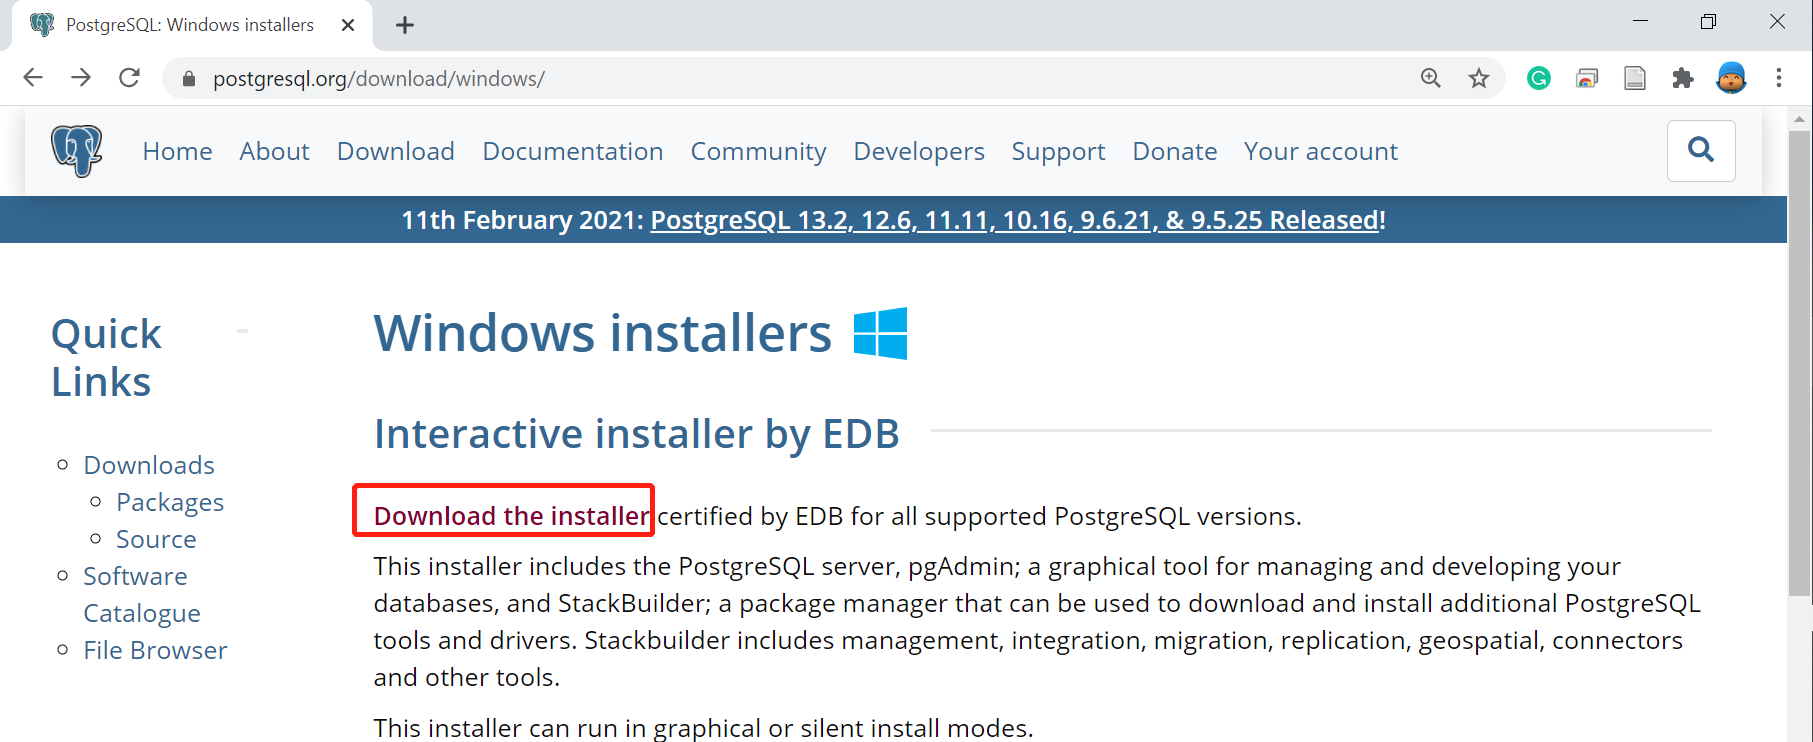
- Step 3: download the installer
- Step 4: download the software
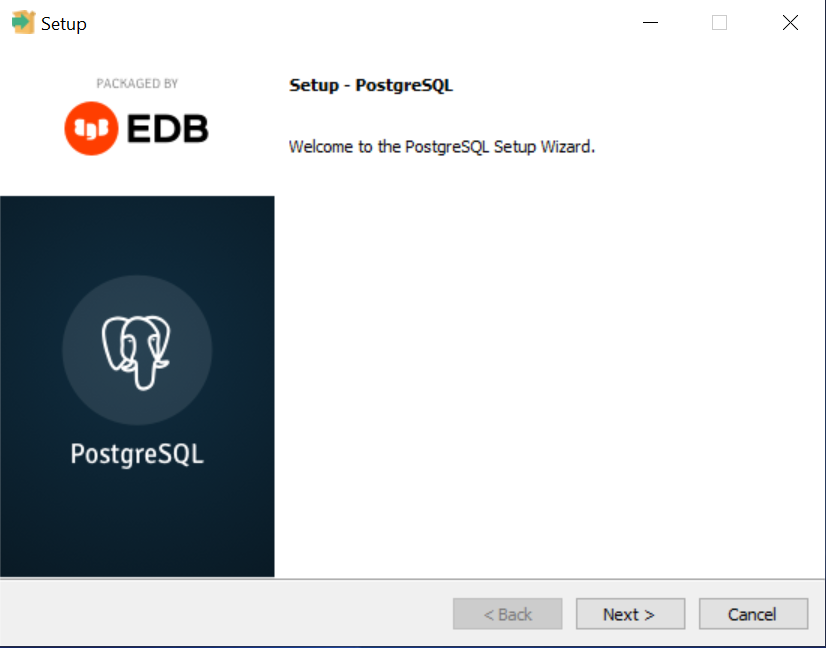
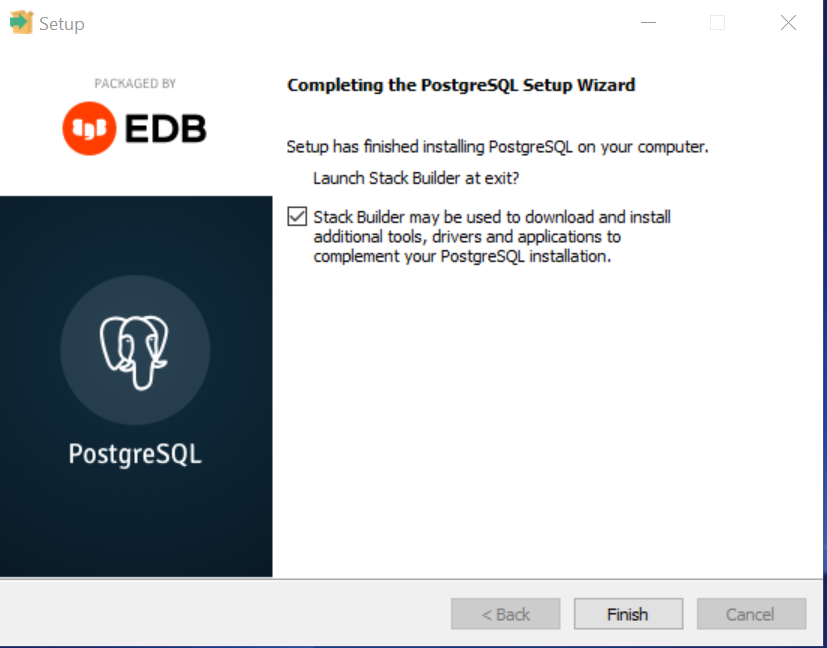
- Step 5: install the PostgreSQL
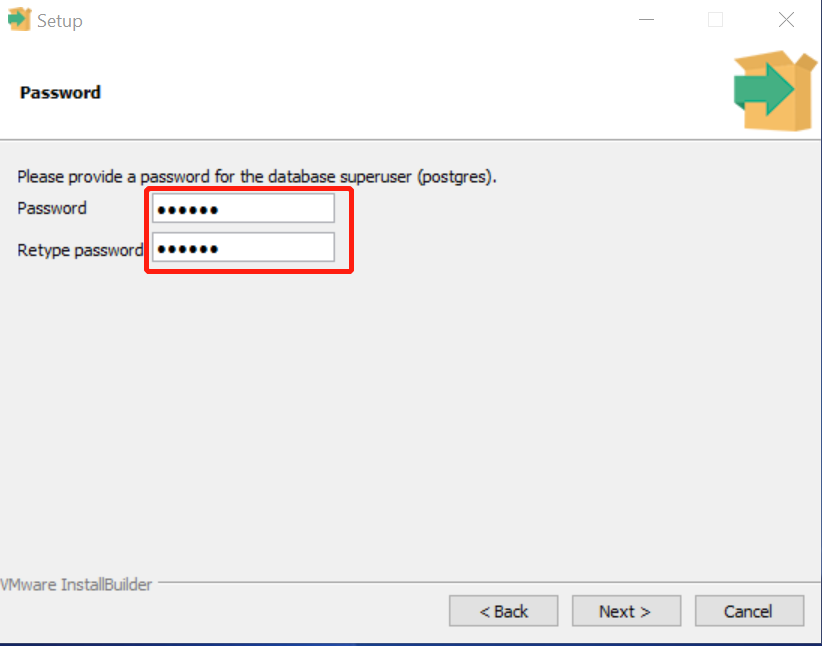
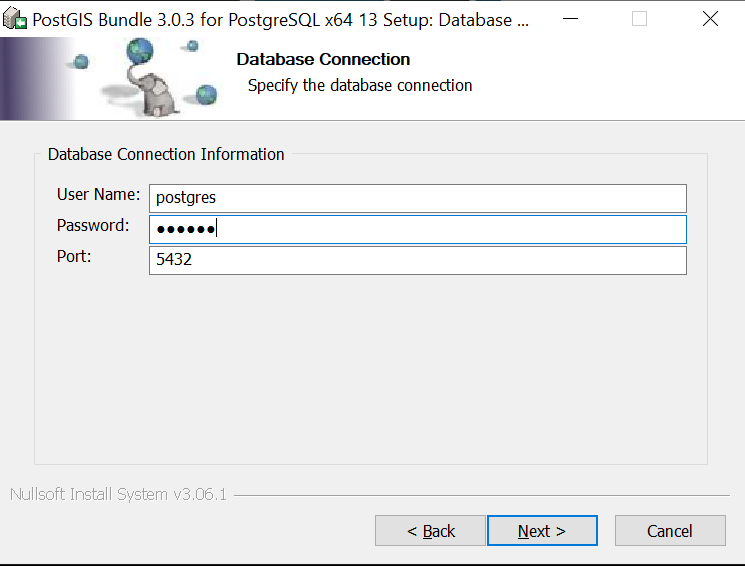
- Step 6: set the password
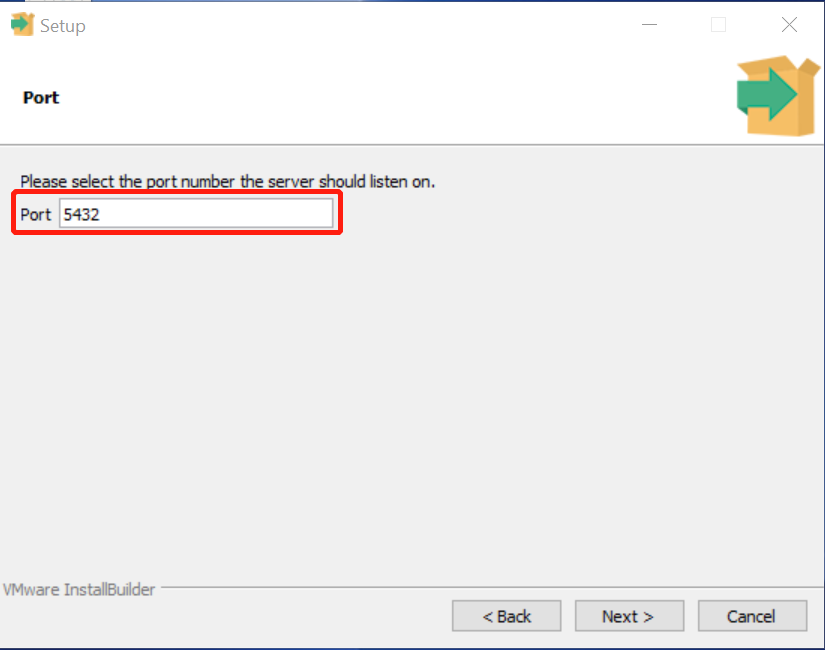
- Step 7: select the port number
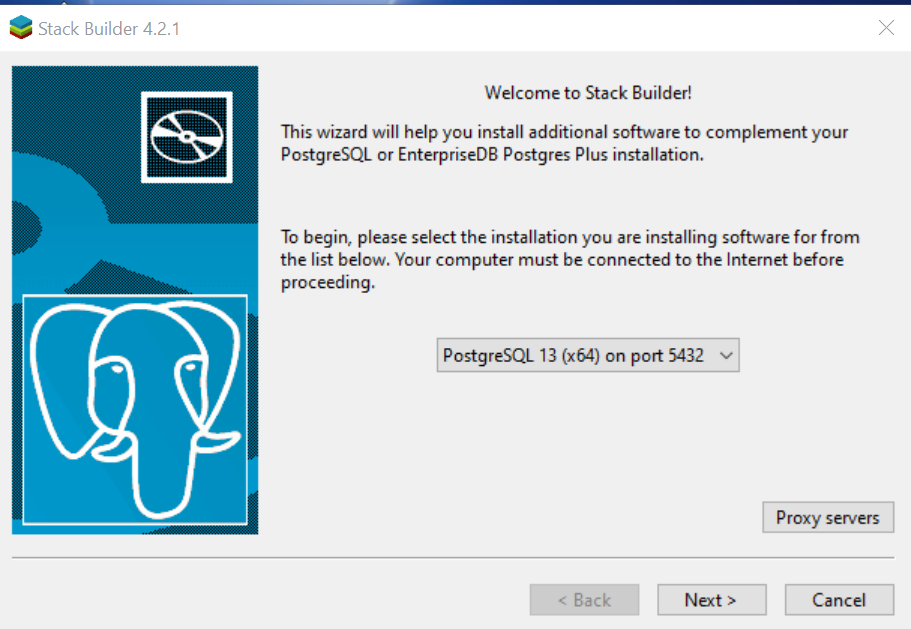
- Step 8: click the Stack Builder
- Step 9: choose the PostgreSQL for additional installation
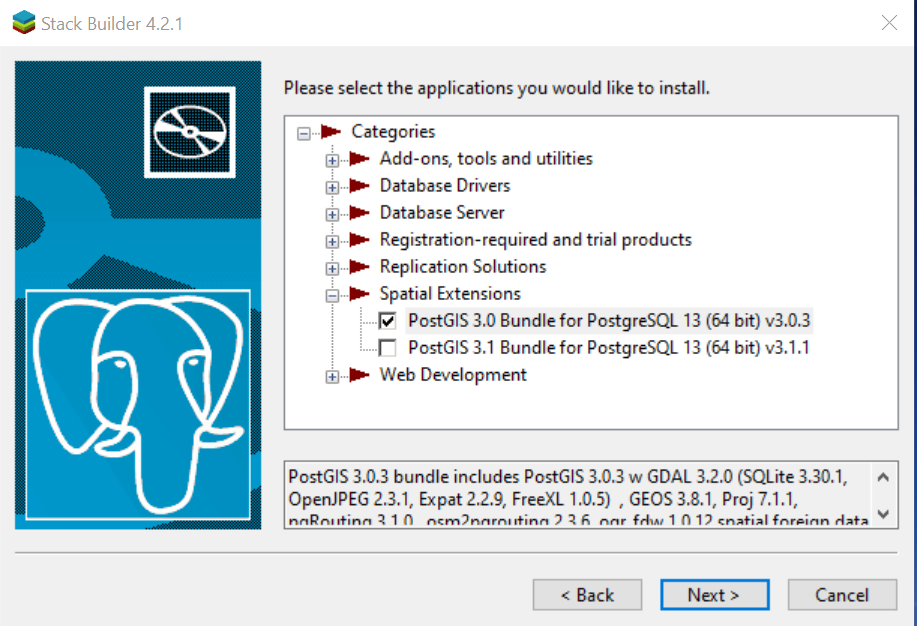
- Step 10: install the spatial extension
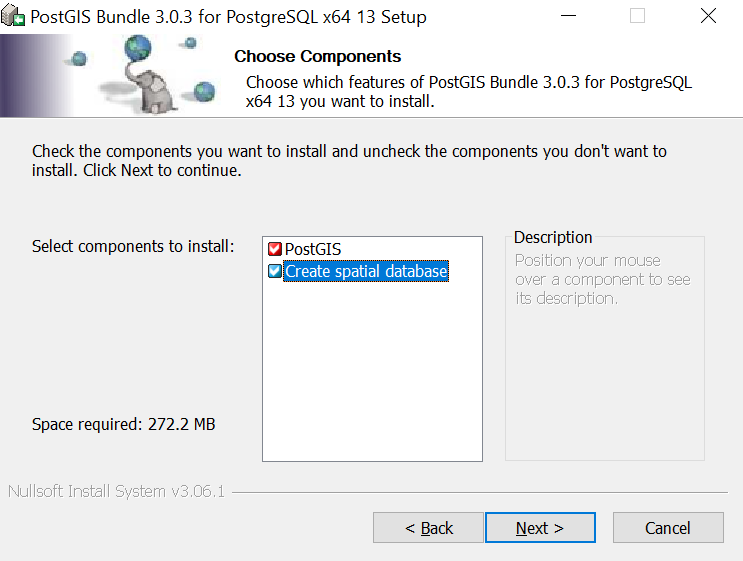
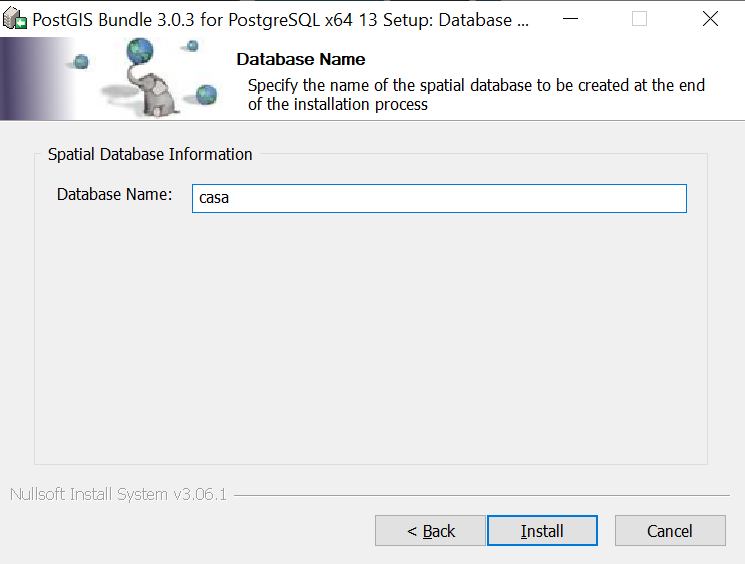
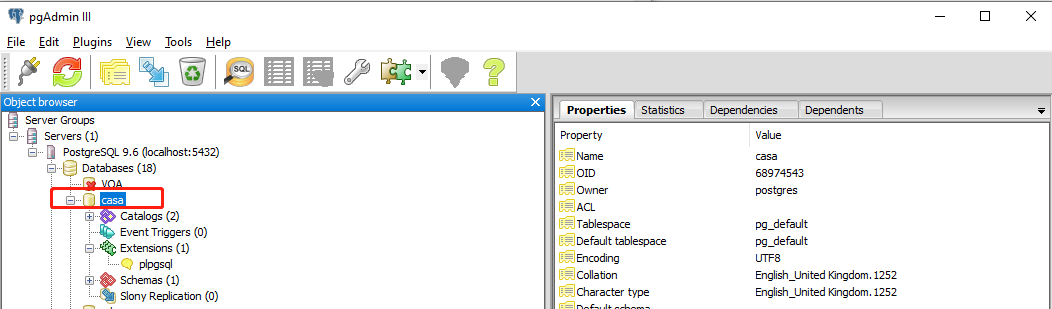
- Step 11: create a postGIS database
- Step 12: Enter the password
- Step 13: set the database name
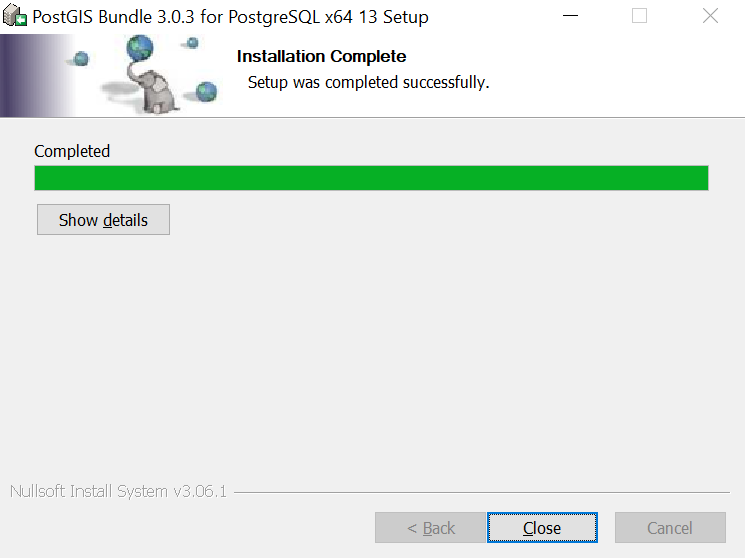
- Step 14: Finish
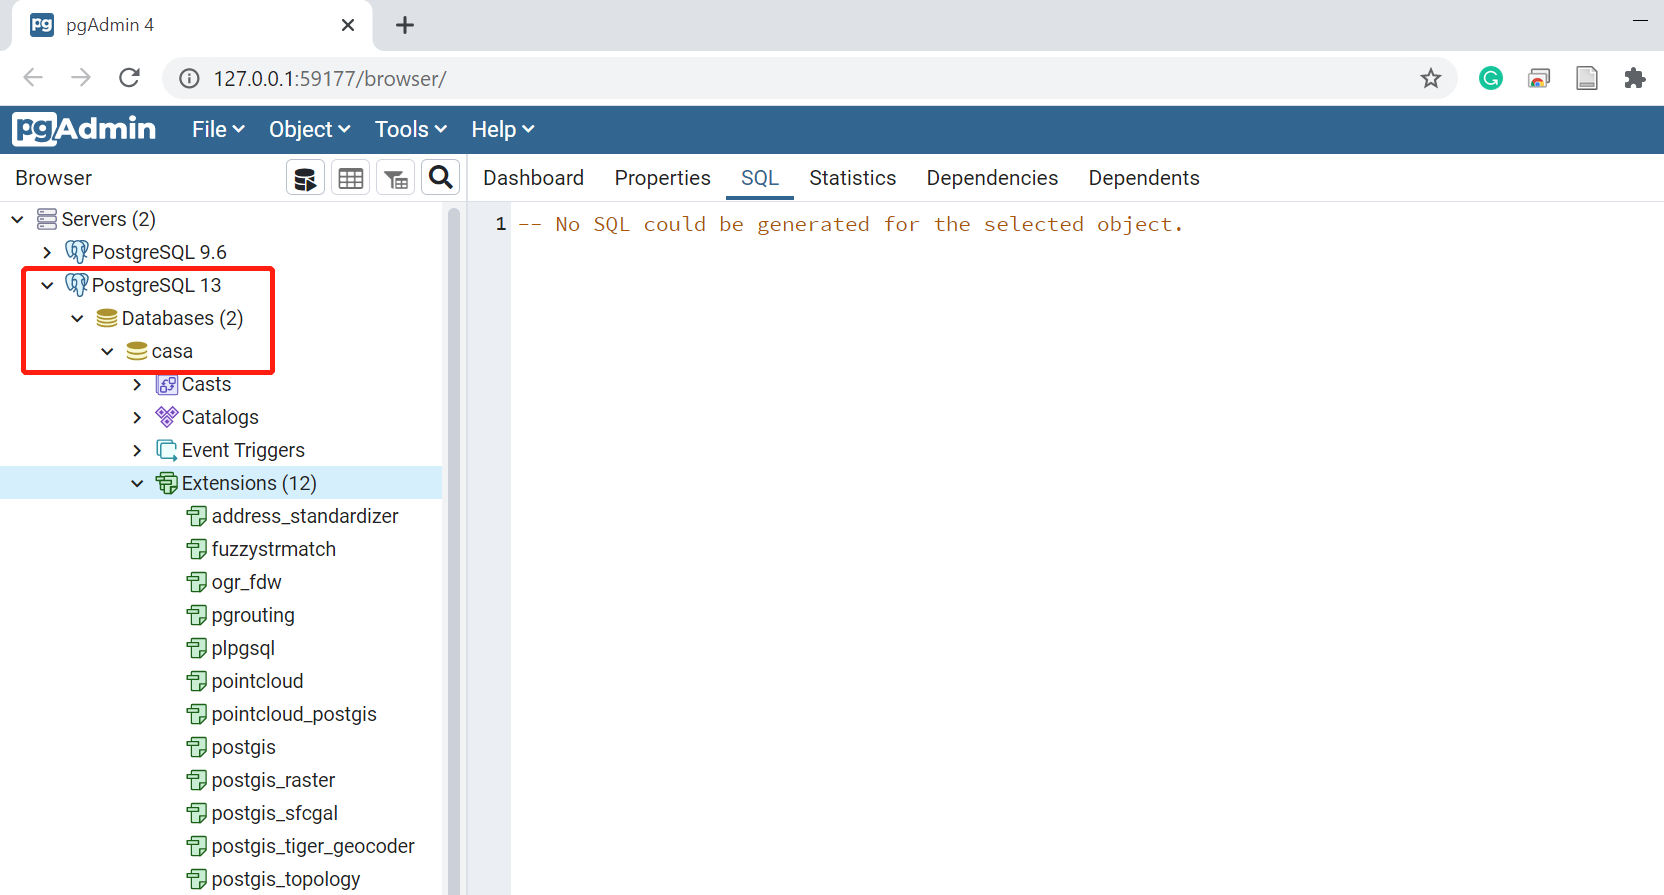
You will find a PostGIS database names as casa in your postgreSQL
3.3.2 Install Alteryx
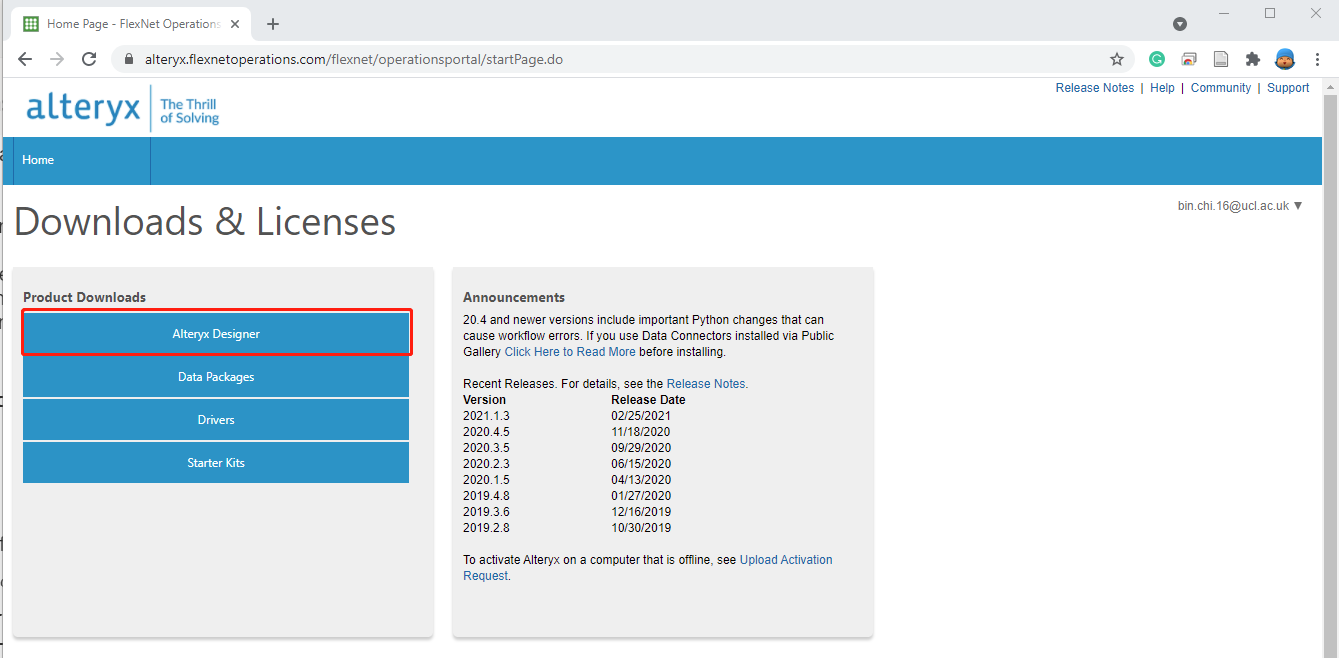
For academics, students, nonprofits institutes, you can install the Alteryx for free through Alteryx for Good.
- Step 1: Apply the Alteryx For Good License

- Step 2: Click the Alteryx Designer in Product Downloads
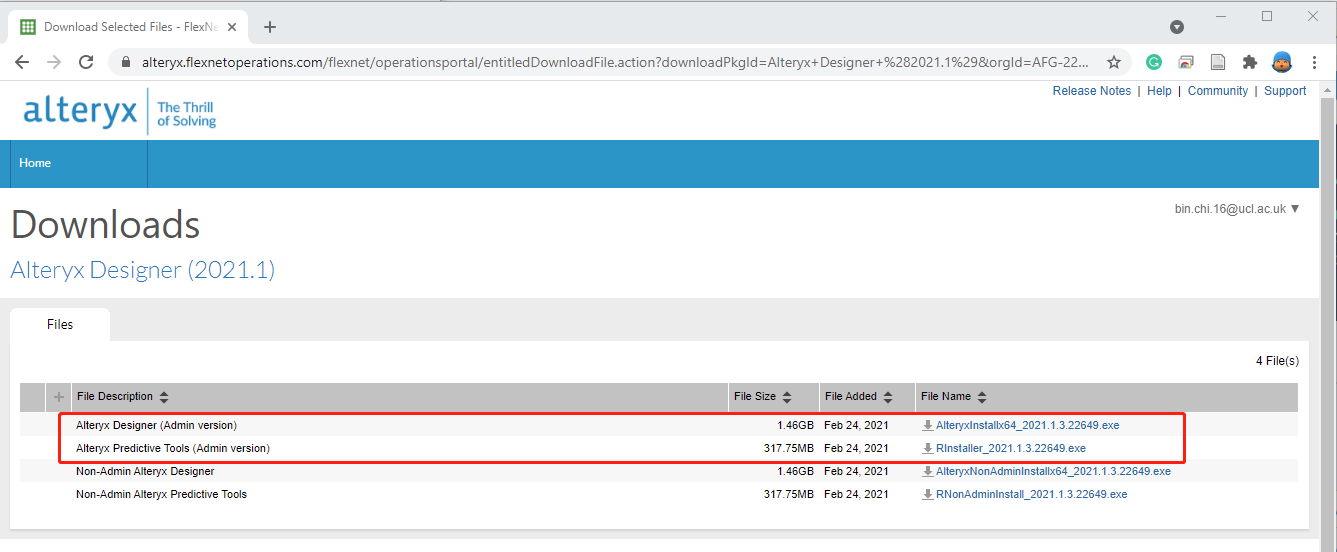
- Step 3: click the Alteryx Designer (2021.1)
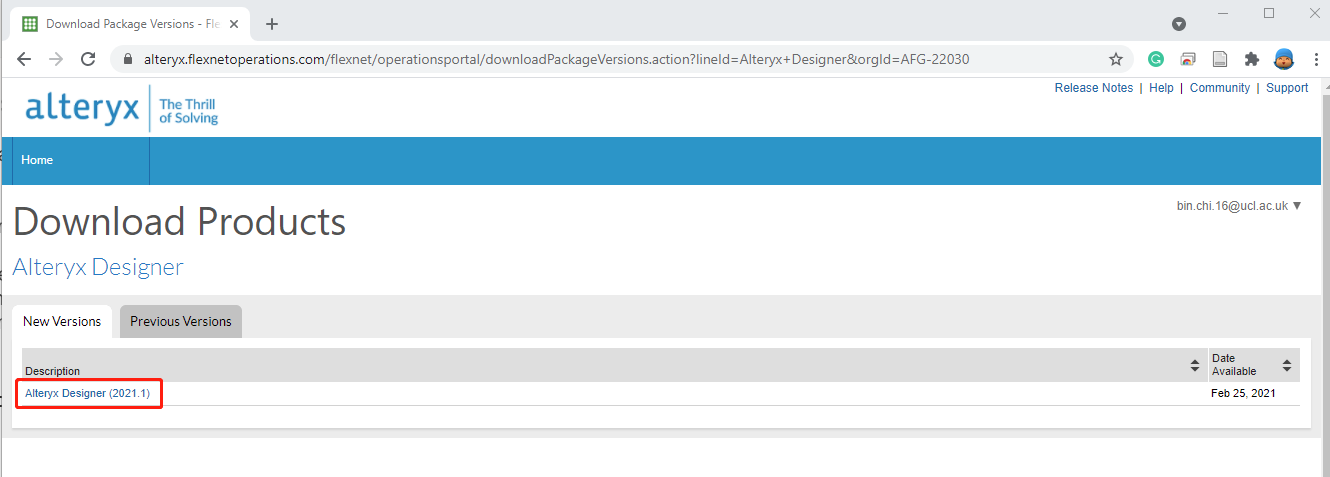
- Step 4: download the Alteryx Designer and Alteryx Predictive Tools